Recently I’ve been assigned to work on Object Detection on BTS antenna using Deep learning modeling with Tensorflow which is very challenging for me and giving me the first time hands on project with deep learning therefore, In this blog I’d like to take a tour and review what I’ve done during my internship.
First of All, Google provide an Object Detection API which already had some models were trained on the COCO dataset and work well on the 90 commonly found objects included in this dataset.It also provide me some tutorial to create custom object from datasets that were collected from the Drone and internet. In this tutorial will base on SSD as a base model for training datasets that would be used as the model for object detection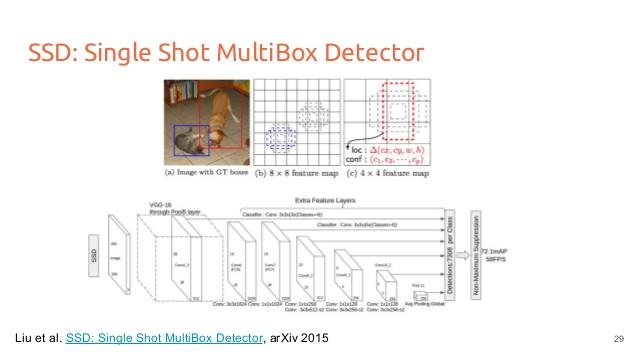
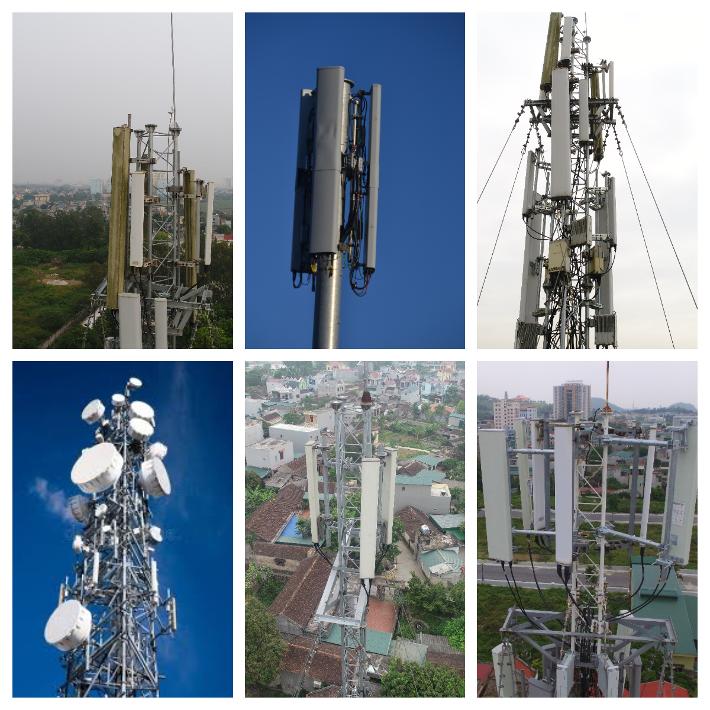
Here I extended the API to train on a new object that is not part of the COCO dataset. In this case I chose that is an object for training set. See gif below. So far, I have been impressed by the performance of the API. The steps highlighted here can be extended to any single or multiple object detector that you want to build.

From following step I’ll take you to the process of training my own object.For installation part you can follow along with Object Detection API or you can follow inside this blog
Installation
Dependencies
Tensorflow Object Detection API depends on the following libraries:
- Protobuf 3.0.0
- Python-tk
- Pillow 1.0
- lxml
- tf Slim (which is included in the “tensorflow/models/research/” checkout)
- Jupyter notebook
- Matplotlib
- Tensorflow
- Cython
- contextlib2
- cocoapi
For detailed steps to install Tensorflow, follow the Tensorflow installation instructions. A typical user can install Tensorflow using one of the following commands:
The remaining libraries can be installed on Ubuntu 16.04 using via apt-get:
Alternatively, users can install dependencies using pip:
Note that sometimes “sudo apt-get install protobuf-compiler” will install Protobuf 3+ versions for you and some users have issues when using 3.5. If that is your case, you’re suggested to download and install Protobuf 3.0.0 (available here).
COCO API installation
Download the cocoapi and copy the pycocotools subfolder to the tensorflow/models/research directory if you are interested in using COCO evaluation metrics. The default metrics are based on those used in Pascal VOC evaluation. To use the COCO object detection metrics addmetrics_set: "coco_detection_metrics"to theeval_configmessage in the config file. To use the COCO instance segmentation metrics addmetrics_set: "coco_mask_metrics"to theeval_configmessage in the config file.
Protobuf Compilation
The Tensorflow Object Detection API uses Protobufs to configure model and training parameters. Before the framework can be used, the Protobuf libraries must be compiled. This should be done by running the following command from the tensorflow/models/research/ directory:
Add Libraries to PYTHONPATH
When running locally, the tensorflow/models/research/ and slim directories should be appended to PYTHONPATH. This can be done by running the following from tensorflow/models/research/:
Note: This command needs to run from every new terminal you start. If you wish to avoid running this manually, you can add it as a new line to the end of your ~/.bashrc file, replacingpwdwith the absolute path ofmodels/research/object_detectionon your system.
Testing the Installation
You can test that you have correctly installed the Tensorflow Object Detection
API by running the following command:
Collect datas
In this step you can collect by finding your target objects on internet or pictures that you’ve captured yourself. For my samples I’ve collect overall 400+ images it’s enough to used for training set. Then you’ll need to create 3 folders”Images“, “Train” and “Test“,
Images:
- “Train” is a folder that you will create for the images where contain objects that you want to trai
- “Test” is a folder for testing an images that you’ve been trained .
Label an image
In this process I use labelImg as a tool to create image annotation in the Pascal VOC format . this tool would let you to create custom object by labeling the object of your collected images. To do it you can simply drag the box and named the object.

After you finish all the labeling you can notice the new xml file has been create when you saved the file.
Create your TF Record for Dataset
Tensorflow API wants the datasets to be in TFRecord file format. This is probably the trickiest part. However tensorflow has provided a couple of handy scripts to get you started — “xml_to_csv.py"and"tf_record.py".I was able to used thetf_record.pywith minimal edits since labelimg already creates annotations in the correct format. I also like that this script randomly takes 30% of the data and creates a validation TF Record file.
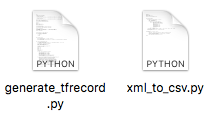
after you compile two python file you will have
- test_labels.csv
- train.xml
- test.record
- train.record
 You will also need to create afile that is used to convert label name to a numeric id.
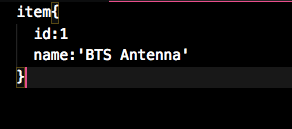
I have included the label_map.pbtxt file and the create_pet_tf_records.py file on my github. In case you are ge
tting stuck anywhere, I highly recommend the Racoon Detector walkthrough provided by Tensorflow.
Creating a model config
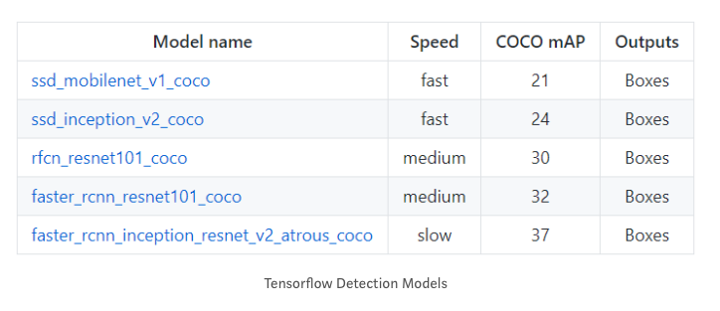
Once the TFR datasets are created, then first you need to select if you will use an existing model and fine tune it or build from scratch. I highly recommend using an existing model since most of the features that are learnt by CNNs are often object agnostic and fine tuning an existing model is usually an easy and accurate process. Please note that if you do decide to build from scratch you will need much more than 150 images and training will take days. The API provides 5 different models that provide a trade off between speed of execution and the accuracy in placing bounding boxes. See table below:
5. Training the model
After a long preparing of training data now it’s time for the real train you can run the following command to train the model
you also need to change the checkpoint name/path, num_classes to 1, num_examples to 12, and label_map_path: “training/object-detect.pbtxt”
Now you’re ready to train you data
in directory models/research/object_detection/train.py
IF there’s nothing to deal with the errors you should see the results like this
you can also run the tensor bird to see the summary of your training. from
models/object_detection, via terminal, you start TensorBoard with:
This runs on 127.0.0.1:6006 in your browser.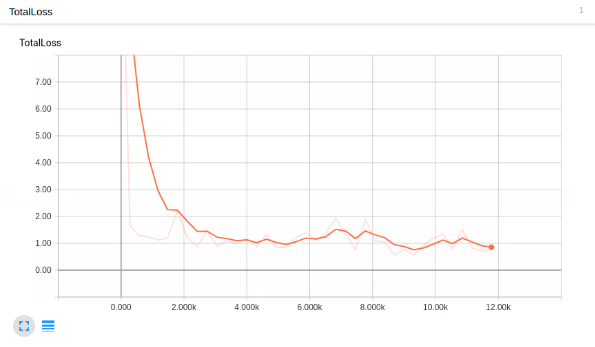
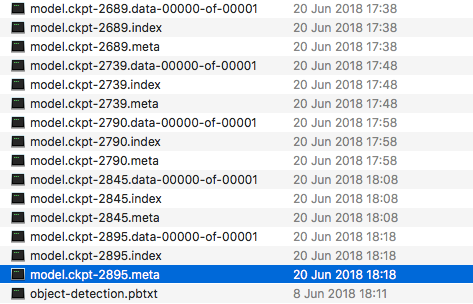
from models/object_detection/training
you will see your new training set has been created from our datasets
6. Testing the model
Lastly after long run of training on your datas. In themodels/research/object_detectiondirectory, there is a script that does this for us:export_inference_graph.py
To run this, you just need to pass in your checkpoint and your pipeline config, then wherever you want the inference graph to be placed. For example:
Now we’ll go tomodels/research/object_detection/tutorialopen your Juypyter notebook select object_detection_tutorial.ipynb the to test out our trained data.
now what you need to change from following codes editing in order test your data:
Finally, in theDetectionsection, change theTEST_IMAGE_PATHSvar to:
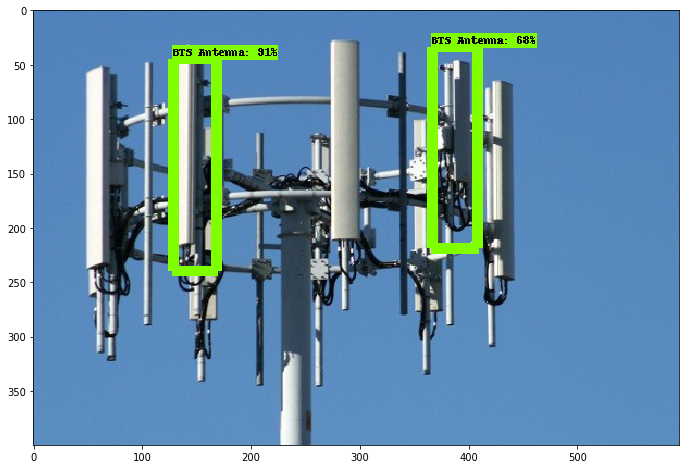
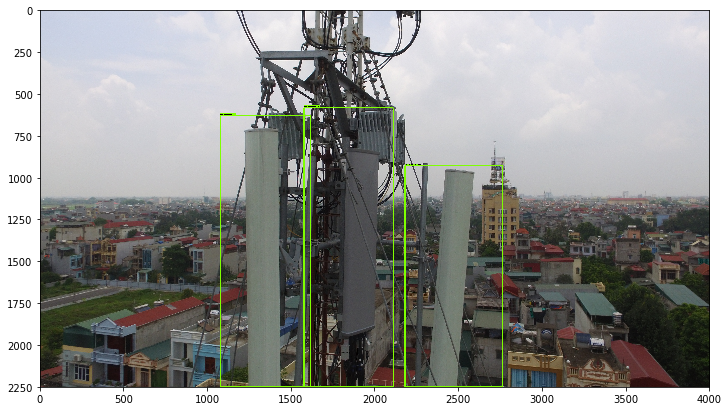
Here’re the result from my test data:

Reference
https://arxiv.org/abs/1512.02325
https://github.com/tensorflow/models
https://towardsdatascience.com/how-to-train-your-own-object-detector-with-tensorflows-object-detector-api-bec72ecfe1d9
https://pythonprogramming.net/introduction-use-tensorflow-object-detection-api-tutorial/