I am writing blog here where you can use the Object Detection API to train your own images which is called customize image training (transfer learning). In this post, I will explain all the necessary steps to train your own detector as my first experience in Machine Learning field. This is the basic post so that we all get used to Object Detection API. For getting more comprehensive knowledge about Tensorflow Object Detection API, we could check the videos in the reference part of this post.

I. Installing configuration environment
- Dependencies
Tensorflow Object Detection API depends on the some libraries such as protobuf 3.0.0, python-tk, pillow 1.0, lxml, jupyter notebook… For detailed steps to install Tensorflow, follow the Tensorflow installation instructions. A typical user can install Tensorflow using one of the following commands:
You can test your installation by this commands:
This installation do not make tensorflow directory in the desktop so you could run the following command to get that directory.
The remain libraries can be installed on Ubuntu 16.04 (or above) using via apt-get:
Note that sometimes “sudo apt-get install protobuf-compiler” will install Protobuf 3+ versions for you and some users have issues when using 3.5. If that is your case, try the manual installation. I’m using Python 3 (specifically 3.6) and Ubuntu 18.04.2 for this blog. With Python 2, you could follow these commands by easily removing the number “3” in python, pip in commands.
- COCO API installation
COCO is a large image dataset designed for many applications including object detection. This packages provides Matlab, Python that assists in loading, visualizing the annotations. Download the COCO API and copy the pycocotools subfolder to the tensorflow/models/research directory if you are interested in using COCO evaluation metrics. The default metrics are based on those used in Pascal VOC evaluation.
If you get an error with the last command, you could manually copy directory pycocotools to the directory tensorflow/model/research.
- Protobuf Compilation
The Tensorflow Object Detection API uses Protobuf to configure model and training parameters. Before the framework can be used, the Protobuf libraries must be compiled. This should be done by running the following command from the tensorflow/models/research/ directory:
- Add Libraries to PYTHONPATH
When running locally, the tensorflow/models/research/ and slim directories should be appended to PYTHONPATH. This can be done by running the following from tensorflow/models/research/:
Note that this command needs to run from every new terminal you start. And you can test that you have correctly installed the Tensorflow Object Detection API by running:
You could see the result like which is in the figure as below.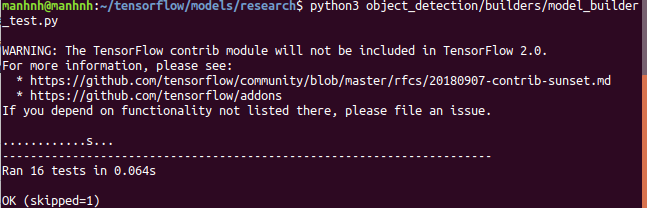
Figure 2: Success installing configuration environment
II. Creating the datase
To proceed to second part, you should know some following definitions:
- Transfer learning
One of the important question is what is transfer learning and why to use pre-trained model. My simple definition is transferring the knowledge to save time. For example, if you want to build a table instead of building it yourself, you can use the knowledge of carpenter (maybe by hiring him) and make it done.
- Why to use pre-trained model
Pre-trained model allows you to do a small change in the model and train your objects with that. It make use of transfer learning where weights are shared. All you need to train dense layer with your classes and leave rest to pre-trained model. It enables you to achieve accuracy with less time and saves the need of GPU (normally expensive) for intense training. Some examples of pre-trained models are VGG16, VGG19, MobileNet, ResNet50, InceptionV3,… that you could get from Tensorflow detection model zoo. This part is about taking the first step for custom object training (with pre-trained model). Tensorflow Object Detection API uses the TFRecord file format, so at the end we need to convert our dataset to this file format. There are several options to generate the TFRecord files. Either you have a dataset that has a similar structure to the PASCAL VOC dataset or the Oxford Pet dataset, then then have ready-made scripts for this cases. If you don’t have one of those structures you need to write your own script to generate the TFRecords (they also provide an explanation for this).
To prepare the input file for the API, you need to consider two things. Firstly, you need an RGB image which is encoded as jpeg or png and secondly, you need a list of bounding boxes (xmin, ymin, xmax, ymax) for the image and the class of the object in the bounding box. In terms of me, I only had one class.
This part focuses on the following steps:
- Create .xml files for each of your own images
- Splitting .xml and image files into training and testing folder
- Creating .csv files (for training and testing) from .xml files
- Creating tf_record files (for training and testing) from .csv and image files.
Create xml file for each of your own images
- Collecting data
In this step, you can collect the data by finding your target objects on the Internet or picture that you’ve capture yourself. I’m using the data with 100 images of car with 80 images for training and 20 images for testing. Then you need to create 3 folders “Image”, “Train” and “Test” that organized in the following structure:
- Labeling images
Once you have images, you need to annotate them. This process can be done by using LabelImg. LabelImg is a graphical image annotation tool that is written in Python and uses Qt for the graphical interface. It’s easy to use and the annotations are saved as XML files in the PASCAL VOC format. To install labelImg, you could run these commands in the terminal:
If everything went well, you will see the below GUI after running the last command.
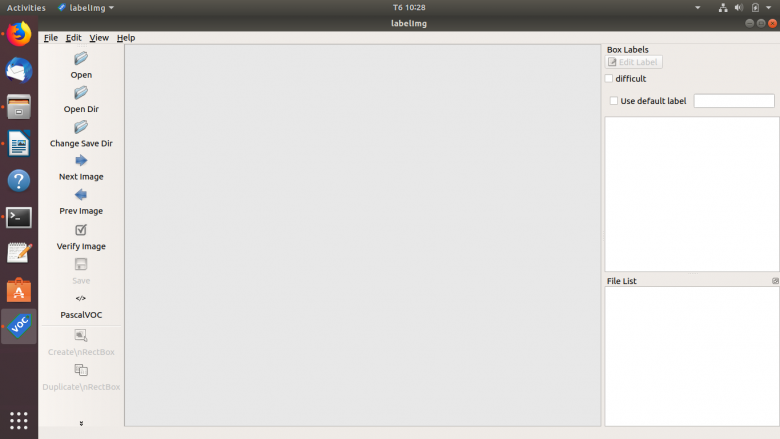 Figure 3: LabelImg UI
To annotate or label step using labelImg, you can simply drag the box and named the object.
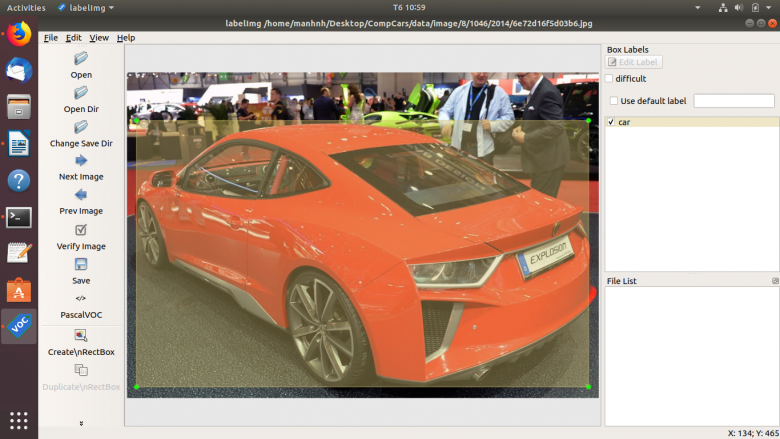 Figure 4: Labeling an Image by labelImg
You can specify where you want to save the .xml file and repeat the process for whole set of images by verifying each image and pointing to next image. After you finish all the labeling you can notice the new XML file has been create when you saved the file.
Splitting xml and image files into training and testing folder
As I’ve said before, I have set 80 images and corresponding XML files into training folder, 20 images and correspoind XML files to testing folder.
Creating .csv files (training.csv and testing.csv) from .xml files
This process can be doneby running thepython file called xml_to_csv.py. This file have already written by datitran for his raccoon_dataset. To create the file that adapt to your dataset, you need to do some modification in the xml_to_csv.py follow this tutorial. After that, go ahead and make a data directory and run this file to create two .csv files.
The .csv files will look like the following picture.
 Figure 5: .csv file demo
Creating tf_record files (for training and testing) from .csv and image files
Now, create a training directory from within the main object_detection dir then you should have the following structure:
This process could be done by running the python file: generate_tfrecord.py. The modification that you will need to make here could also be found in the tutorial for changing xml_to_csv.py above. It is time to issue last two commands to generating your record files. Please leave model directory and enters to your directory where .csv files are created and data folder is present and issue the following commands.
Now, in your data directory, you should have train.record and test.record file. In the next part, we need to setup a configuration file and then either train a new model or start from a checkpoint with a pre-trained model.
III. Training the model
After creating the required input file for the API, you now can train your model to detect our custom object. We need to setup the configuration of the model, then we can train as in the following steps:
- Downloading the pre-trained model and configure configuration file
- Training the custom image using the pre-trained model
- Create your model by using the checkpoints you saved
Downloading the pre-trained model and configure configuration file
There are many models which can be downloaded from tensorflow detection model zoo. For my example, I download ssd_mobilenet_v1_pets.config and ssd_mobilenet_v1_coco_11_06_2017.tar.gz for better speed. Then we have to make some changes in the above .config file that could follow the tutorial. Now, create a file object-detection.pbtxt inside the directory training which we have created and write the following lines in it:
Please note that both the ssd_mobilenet_v1_pets.config as well as object-detection.pbtxt must be inside the directory training.
Training the custom image using the pre-trained model
Make sure that the directories images, data, training and ssd_mobilenet_v1_coco_11_06_2017 inside the directory models/research/object_detection and run the following commands:
The train.py file sometimes is inside the legacy folder of object_detection directory so that the first command will be changed as follow:
If everything is fine, you will see the result as below.
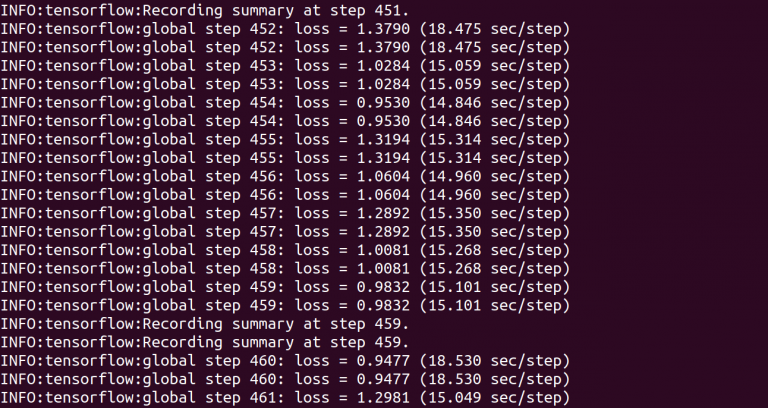 Figure 6: Result of training the model
You can also monitor the process of training and evaluation jobs by running Tensorboard on your machine:
If you get an error, you could try to do another way as below.
After that, you will get the link as http://xx:6006. Please open it in the web browser and you will access to the tensorboard where you will get the process of each of your step. Please refer to below screenshot to know it more.
Figure 7: Tensorboard demo
Create your model by using the checkpoints you saved
When you finished training step with your own images, you will get the checkpoints as well as model.ckpt file in the training directory. Now it is the time to create your own model from the checkpoints, config file which you have created while training the model. To do this, please execute the following script:
When you execute the above command, you will get the new directory with the name car_inference_graph which has the model, checkpoint data and frozen_inference.pb file:
Frozen_inference_graph.pb: This is protobuf format. It has the graph definition and trained parameters so that it cannot be trained anymore. Freezing means the process to identify and save all of the required things in a single file that you can use easily. If you look at the tensorflow model, it has 4 files.
Model-ckpt.meta: It contains the complete graph (contains Meta GraphDef protocol buffer). This graph definition describes the data flow.
Model-ckpt.data-0000-of-00001: It contains the value for the variable (weights, bias, placeholders, gradient).
Model.ckpt.index: It is the meta data
Checkpoint: All checkpoint information.
IV. Test the model
Now, we’re just going to use the sample notebook, edit it and see how our model does on some testing images. I copied some images in the directory models/object_detection/images/test images into the models/object_detection/test_images directory and renamed them to be image3.jpg, image4.jpg…etc. Booting up jupyter notebook and opening the object_detection_tutorial.ipynb and make a few changes. You could see the detailed changes in this tutorial. After that, you can run the jupyter notebook as follow:
And you could see the jupyter-notebook in your web browse.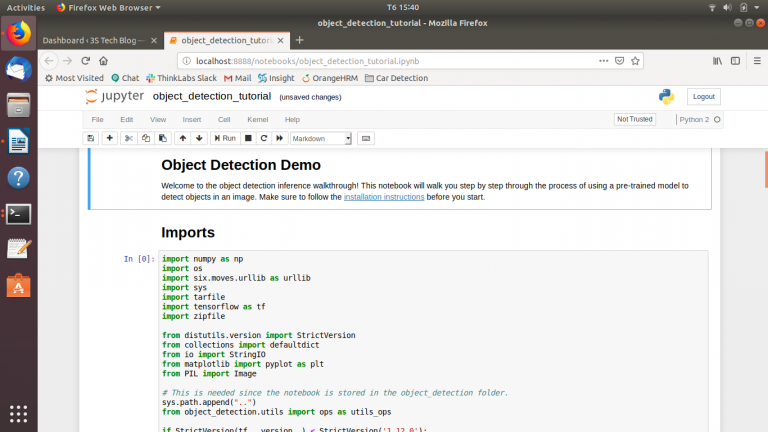

Figure 8: Object Detection Demo using Jupyter notebook

Figure 9: Car detection testing results
Reference
https://github.com/tensorflow/models
https://pythonprogramming.net/introduction-use-tensorflow-object-detection-api-tutorial/